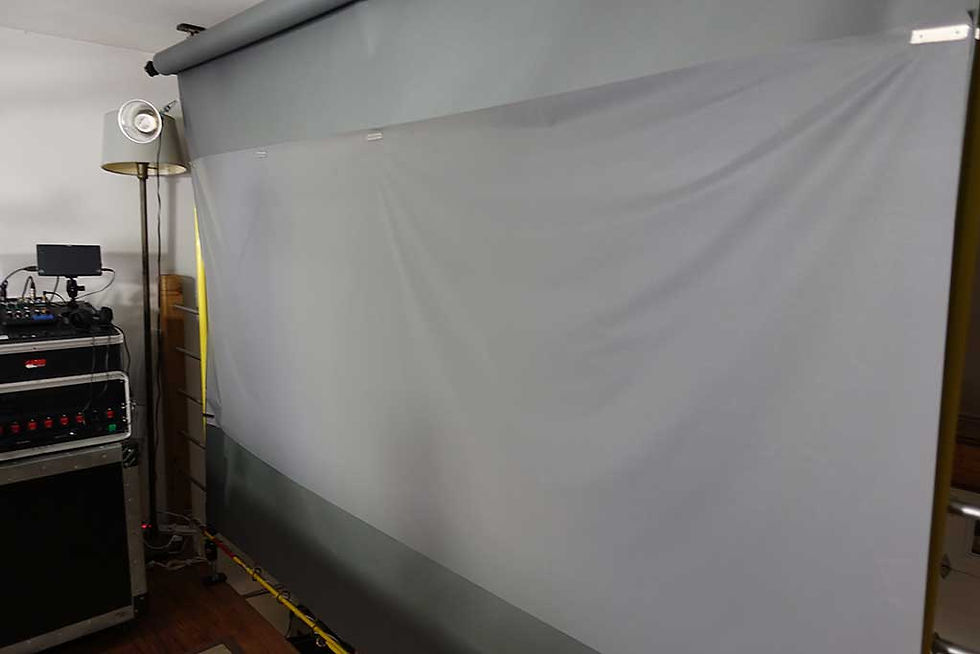
Making a Green Screen that doesn’t require any Lighting!
- Brainy-Bits

- Oct 24, 2020
- 4 min read
Updated: Oct 27, 2020

OVERVIEW

If you ever tried to use a green screen for your videos by using a green cloth material, you know that making the green colour as even as possible will give better results when the time comes to bring that video in your editing software to key out.
But to do this you need a lot of lights at different position to light up the green screen perfectly without casting any shadows.

Also your subject must be pretty far away from the green screen to not have the green colour reflected on them which will make keying more difficult.
So as you can see using a green screen is not that easy, and requires a lot of space if you don’t want problems with green spill.
PARTS USED
Arduino UNO
WS2812 LED RING
These are Amazon affiliate links...
They don't cost you anything and it helps me keep the lights on
if you buy something on Amazon. Thank you!
Retroreflective Material
RETROREFLECTIVE MATERIAL

Another way to make a green screen is to use a RetroRlective material (Wikipedia link) instead of just a plain green cloth.
Now this is nothing new (meaning I didn’t come up with it…) in fact, there is a product that you can buy, but the problem is the cost ($2000USD+) you can check it out here.

RetroReflective material used on Safety Vest
The principle is that by using a ring of LED’s placed around the lens of your camera, the light emited from the leds (green or blue) will hit the retroreflective material and be reflected directly back to the camera lens.
To the naked eye you don’t notice any difference but your camera will see the entire screen as perfect green.
One cool thing about this system, is that the closer the subject is the to screen the better it works since there is no green spill like the usual cloth method, so it’s great if you have a smaller space to shoot your videos.
The hardest part was finding a supplier of this material in pieces large enough to make the screen.
I got lucky and found an eBay supplier who sells this material in rolls of 39 inches wide, here’s a link to the seller on eBay.
Next I started working on the LED Ring…
THE LED RING

I started by printing on my 3D printer the enclosure that would hold the rings with an opening in the middle that would fit around my camera lens.
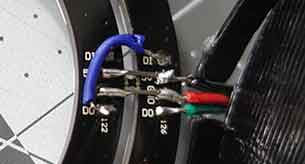
** Some of these LED rings have the legend for the connections printed wrong **

During the manufacturing it seems that the connections legend was printed on the boards incorrectly.
Here are the correct connections:
DI (digital In)= DO (digital Out) 5V = GND GND = 5V DO (digital Out) = DI (digital In)
Then the 5V and GND of the outer ring is connected to the same pins of the inner ring.
The DI of the outer ring is connected to the DO of the inner ring (since the legend is wrong, if it’s not then connect the DO to DI).
Here’s a picture of my connections of the 2 LED rings

Black wire = GND
Red wire = 5V
Green wire = D1 or Digital in which will be connected to pin 8 of the Arduino UNO.

CONNECTIONS

The connections for this tutorial are pretty straightforward:
The 5V and GND of the UNO is connected to the outer LED ring 5V and GND *Don’t forget that the 5V and GND on the LED ring is inverted like mentioned above*
Then pin 8 of the UNO is connected to the D1 pin of the LED ring
*Again inverted so it’s the D0 pin*
The inner ring has the 5V and GND of the outer ring connected together and the D0 of the outer ring is connected to the D1 of the inner ring.
THE CODE
We are using the FastLED library to light up the LED ring the Green colour, but you can have it light up any colour you want.
You can also adjust the brightness of the LED’s if you want your green screen to be darker or brighter.
/* Start of Code */

#include "FastLED.h"

// How many leds are connected?
#define NUM_LEDS 40

// Define the Pins
#define DATA_PIN 8

// Define the array of leds
CRGB leds[NUM_LEDS];

void setup() {
FastLED.addLeds<NEOPIXEL,DATA_PIN>(leds, NUM_LEDS);
FastLED.clear();
}

void loop() {


// Change led colors
for(int led = 0; led < NUM_LEDS; led++) {
leds[led] = CRGB::Green;
}

FastLED.setBrightness(75);
FastLED.show();

}

/* End of Code */
THE RESULTS

After installing the LED ring around my camera and turning on the Arduino UNO, I was projecting Green onto the RetroReflective material.
And here are the results:

After some testing, this is working amazingly well!
Like I mentioned at the beginning, this type of Green screen works better the closer you are to it, so it’s great for smaller spaces were you can’t be 6 feet away like required for a regular Green screen and not having to have extra lights is a big plus as well.
I hope you enjoyed this project, and don’t forget to watch the tutorial video to get more information and see it in action!
TUTORIAL VIDEO
DOWNLOAD
Copy and Paste the above code/sketch in your Arduino IDE software.
Donwload the FastLed library here:
You can find some 3D parts for the Camera LED ring on Thingiverse here


Comments