DHT11 vs DHT22… Easy to use with an Arduino but which one should you get?
- Brainy-Bits

- Oct 24, 2020
- 4 min read
Updated: Oct 28, 2020

OVERVIEW
One of the first tutorial I made was for the DHT11 sensor and that was quite a long time ago… So let’s revisit these temperature and humidity sensors.

These types of sensors are very popular in Arduino projects, so in the coming weeks I will make some tutorial videos exploring the many types available.
In this first part we will look at the most popular ones: The DHT11 and the DHT22.
On the surface these two sensors share a lot of similarities:
Same pinout
Exterior casing (although the DHT22 is a little larger)
Both can measure temperature and humidity
In this tutorial we will be using a library designed to work with both the DHT11 and the DHT22, so it kinda confirms that these are pretty similar.
So let’s find out how to use them with the Arduino and which one you should choose for your project.
PARTS USED
DHT11
DHT22
OLED Display
These are Amazon affiliate links...
They don't cost you anything and it helps me keep the lights on
if you buy something on Amazon. Thank you!
THE DHT-11
The DHT11 is the one that you probably have come across, it’s cheap and many tutorials have been made about it.

Here at the specs:
Temperature range: 0 – 50 degrees Celcius (+- 2 degrees) Humidity range: 20 – 80% (+- 5%) Sampling rate: 1HZ (One reading per second) Operating voltage: 3 – 5V
When we compare it to the DHT22 it is better in two area:
The sampling rate
Physical size (it’s a little smaller…)
THE DHT-22

The DHT22 can be seen as a more expensive version of the DHT11 with better specs:
Temperature range: -40 to 125 degrees Celcius (+- 0.5 degrees) Humidity range: 0 – 100% (+- 2-5%) Sampling rate: 0.5HZ (One reading per 2 second) Operating voltage: 3 – 5V
When we compare it to the DHT11 it is better in one area:
Better range and accuracy in temperature and humidity readings
But worse in two areas:
Slower sampling rate
Bigger physical size
It’s also a bit more expensive than the DHT11, but if you need the greater range and accuracy it might be worth it.
DHT11 and DHT22 PINOUT
Both the DHT11 and DTH22 share the same pinout.

The DATA pin of both of these need to be Pulled Up for reliable communication.
In this tutorial we will use the internal PullUp resistors of the Arduino, but in some cases you might need to use a physical resistor for these.
Check out the tutorial video for more information on when that might be needed.
*NOTE: If you use a DTH11 or DHT22 module, these might already have a PullUp resistor installed onboard, in that case you shouldn’t use the internal PullUp resistor of the Arduino.
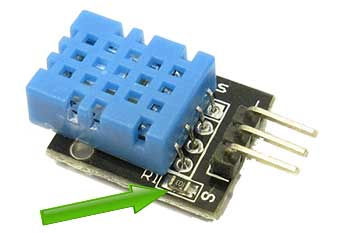
Note that NOT ALL modules have this resistor installed, so you need to check if it is present on the module PCB.
Also if you module includes a power LED than you would need to see 2 resistors onboard since the LED needs one.
CONNECTIONS

The small OLED display uses I2C so the connections need to use the I2C pins of the Arduino:
SDA pin of the OLED is connected to the A4 pin of the Arduino SCL pin is connected to the A5 pin of the Arduino.
The DHT11 Data pin is connected to pin 4 and the DHT22 Data pin is connected to pin 5
3.3v of the Arduino is connected to the VCC pins of both the DHT11 and DHT22
5v of the Arduino is connected to the VCC of the OLED
GND of the Arduino is connected to the Ground pins of the OLED and both sensors.
THE CODE
I’m using a small OLED display to show the readings of both the DHT11 and DHT22.
This information is updated every two seconds which is the recommended update time for the DHT22, although the DHT11 can be updated a little bit faster (once a second).
You can find a link to download both library used in this tutorial at the bottom of this page.
As always don’t forget to check out the tutorial video for more information and the testing results.
/* Arduino DHT11 and DHT22 Oled Display

Created by Yvan / https://Brainy-Bits.com

This code is in the public domain...

You can: copy it, use it, modify it, share it or just plain ignore it!
Thx!
*/


#include "U8glib.h"   // Library for OlED display https://github.com/olikraus/u8glib/
#include "dht.h"      // DHT sensors library https://github.com/RobTillaart/Arduino/tree/master/libraries/DHTstable

#define DHT11PIN 4  // DHT11 Data pin connected to digital pin 4 on Arduino
#define DHT22PIN 5  // DHT22 Data pin connected to digital pin 5 on Arduino

// OLED SDA and SCL  pins connected to A4 and A5 of Arduino
U8GLIB_SSD1306_128X32 u8gDHT(U8G_I2C_OPT_FAST);  // Init of the OLED

dht DHT11;  // library link for the DHT11
dht DHT22;  // library link for the DHT22

void setup() {

// Use PullUp resistors for both DHT Data pins
  pinMode(DHT11PIN, INPUT_PULLUP);
  pinMode(DHT22PIN, INPUT_PULLUP);

// Rotate screen 180 degrees on OLED, uncomment if required
  //u8gDHT.setRot180();

// Select font to use
  u8gDHT.setFont(u8g_font_unifont);
}

void loop() {
  int DHT11Check = DHT11.read11(DHT11PIN);  // get data from DHT11
  int DHT22Check = DHT22.read22(DHT22PIN);  // get data from DHT22

// Check if read data checksum is valid
  if ((DHT11Check == 0) && (DHT22Check ==0)) { // valid when equal to zero

// Display information on the OLED display
    u8gDHT.firstPage();
      do {
          u8gDHT.drawStr( 0, 10, "DTH11:");
          u8gDHT.setPrintPos(65, 10);
          u8gDHT.print(DHT11.temperature, 0);  // Display no decimal
          u8gDHT.drawStr( 88, 10, "|");
          u8gDHT.setPrintPos(104, 10);
          u8gDHT.print(DHT11.humidity, 0);
          u8gDHT.drawStr( 0, 32, "DTH22:");
          u8gDHT.setPrintPos(57, 32);
          u8gDHT.print(DHT22.temperature, 1);  // Display one decimal
          u8gDHT.drawStr( 88, 32, "|");
          u8gDHT.setPrintPos(97, 32);
          u8gDHT.print(DHT22.humidity, 1);
        } while( u8gDHT.nextPage() );

     delay(3000); // delay before reading sensors again (min. 2 seconds)
  }
}
CONCLUSION
If your project doesn’t rely on super accurate temperature readings and doesn’t need humidity then the DHT11 would do the trick.
Keep in mind that it only reads from 20-80 degrees celsius.
On the other hand if you need both temperature and humidity readings then the DHT22 is the one you want.
The DHT22 costs just a bit more, but it provides a greater temperature range, is more accurate and the humidity reading actually works unlike the DHT11.
TUTORIAL VIDEO
DOWNLOAD
Copy and Paste the above code/sketch in your Arduino IDE software.
Download the U8g library here:
Download the DHT library here:


Comments